New to installing D Fenders? Don't worry, whilst every boat and yacht is different there are some standard fitting recommendations. Whether you are replacing an existing rub rail or starting from scratch, this step by step guide should help you get the best results for your new fender.
Tools you will need
-
- Tape Measure
- Reversible Speed Drill
- Putty Knife
- Sealant Application Gun
- Drill Bits
Materials
- D-Fender
- Rigid PVC Fixing Strips
- Marine Grade Adhesive
- Stainless Steel Screws / Bolts
- Safety Googles
Measuring
Take time to plan the fitting of your boat and be aware or any bends or joins required.
How to calculate the length of fender you require -
Double the boats length, add the boat's width, then add an extra 1 or 2 meters to allow for the hull's radius.
Fixing Recommendations
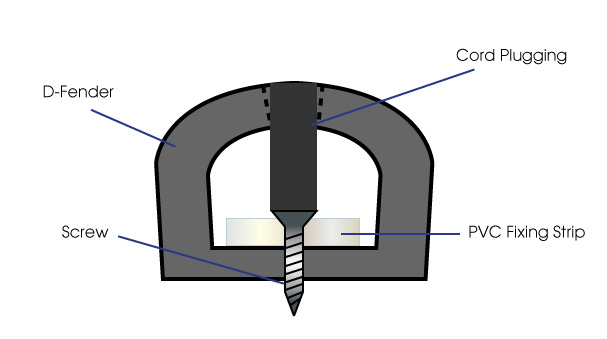
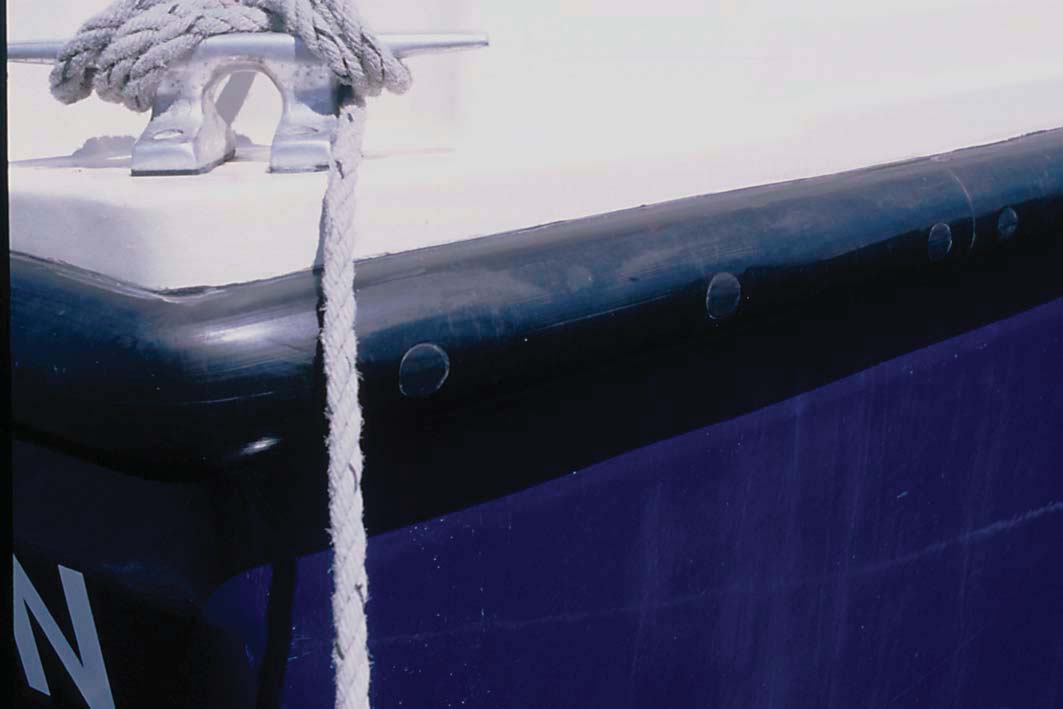
Inserting PVC strips will help secure the fender and act as a washer for the bolts. It is recommended the fixings are between 75mm - 200mm apart, or closer for larger profiles. Above all, be careful when drilling the fendering, drilling too far into your boat you risk damaging the surface of the D fender with the chock of the drill.
Tip: apply some sealant to the end of each screw before fitting to ensure the hole is well sealed!
Replacing An Existing D-Fender
If you are replacing an existing fendering system then it will typically be held in place by one of two methods - screws or pop rivets. These instructions will cover replacing the fendering in both instances.
Remove Old Rub Rail
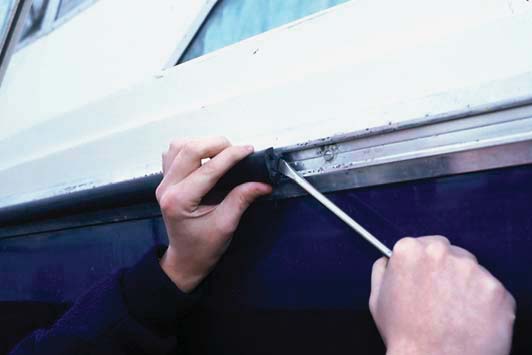
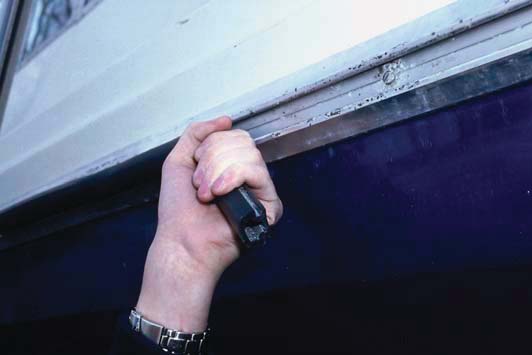
1) First of all, remove end caps to allow access to profile. Which are held in place by screws and perhaps some silicon sealant.
2) If there is an insert within the profile remove this too which will then allow you to ascertain the method of fixing (note: you may also need to remove any plugging to see fixings):
Screws – simply put the required screwdriver bit (either Philips or flathead) into your drill and remove them by reversing the drill.
Pop rivets – this is slightly trickier as the heads will need to be drilled out. To do so you will require a drill bit that is no bigger than the shaft of the rivet. This is to ensure that you only remove the head of the rivet. Once done the shaft can then be pushed through.
3) Fixings will usually be found every 75-200mm. Rigid PVC or Aluminium Fixing Strips may also be present which act as a strengthener within the profile. Depending on your working conditions and size of profile being removed it may be easier to remove the old fendering in sections.
4) Remove end caps, insert, fixings and fendering. There will quite likely be silicone sealant behind the fendering which will pull away when the fendering is removed.
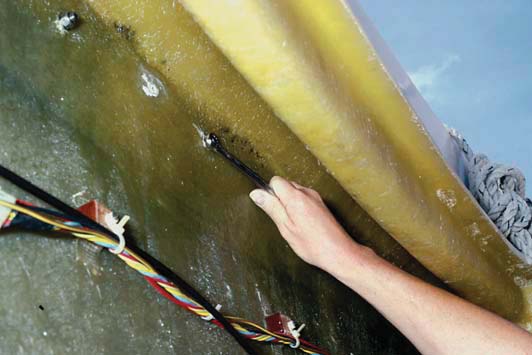
5) Now use the putty knife to gently remove any excess or loose silicone sealant that was revealed when the fendering was removed whilst being careful not to damage the gelcoat of the hull.
6) Put the silicone sealant in the applicator gun and go around the boat filling in the holes left by the old fendering’s fixings.

Measure and Fix to the Boat
7) Mark on a length of Fixing Strip the desired spacing of your fixings and then drill these out to accept the diameter of your chosen screws/bolts.
8) Using this as a template mark and drill holes in the remaining Fixing Strips.
9) Place a Fixing Strip along the top of the D Fenders and mark matching drilling points on the surface of the profile.
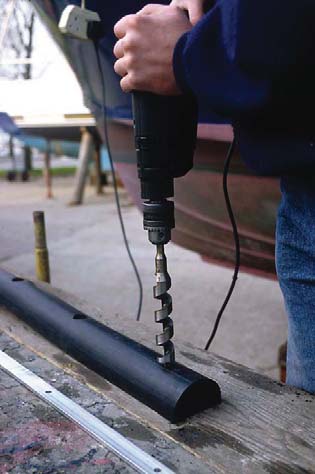
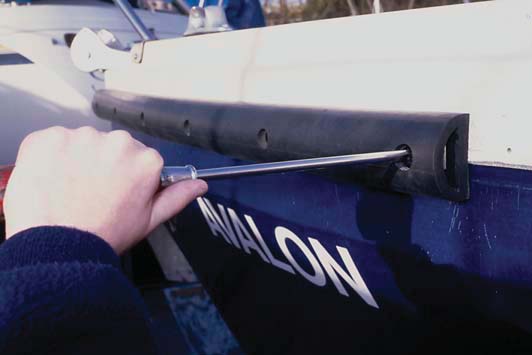
10) Fit a drill bit of the same size/slightly smaller than your chosen Cord Plugging diameter and drill holes into the face of the profile as marked ensuring that you only drill into the top of the profile and NOT into the base. This will allow your chosen screw/bolt heads to pass cleanly into the profile for fixing to the hull.
11) Place fixing strip inside of profile – ideally you will overlap these between the lengths of D fenders.

Install D-Fender
12) Mark the middle of a length of fendering with tape so that you can evenly distribute the profile around the boat.
13) Put the marked area of fendering up to the bow of the boat and then ‘roll’ the d fenders around the hull until you reach the end of the length. This gives you your first fixing point to start the installation of the fendering.
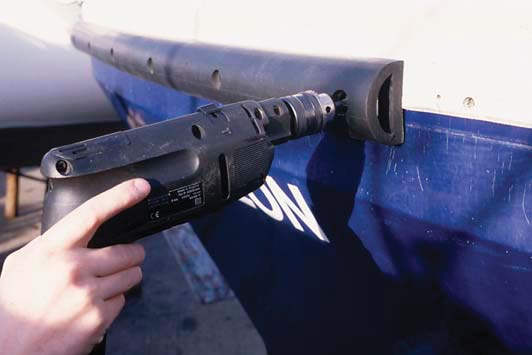
14) Whilst holding the fixing strip central within the D Fender, pass the drill bit through your predrilled hole in the Fixing Strip and drill into the hull.
15) Secure with chosen fixing and repeat steps 10 through 15 on the remaining side of the boat.
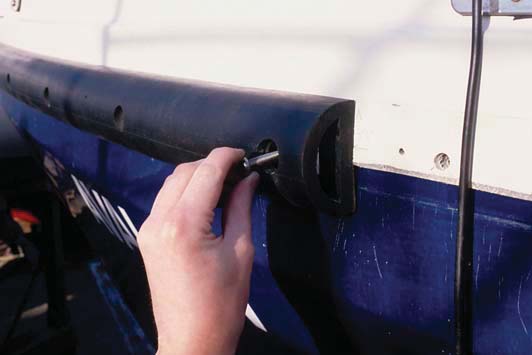
17) Trim enough Cord Plugging off the length so that it touches the screw / bolt head and secure with some suitable marine adhesive.
18) Secure and finish the fendering with an end cap.
Job Done! Do get in contact if you have any questions, you can call us on 01420 474123.
Whilst we endeavour to ensure that the information given herein is true and reliable it is given only for guidance to our customers. It is the user’s responsibility to ascertain the suitability of the products by their own tests.